10 Post-Processing Tips to Improve Your photos
Photography is an art that allows us to capture and immortalize moments, it tells stories through visuals. The magic of photography doesn’t end with the click of the shutter. Post-processing, the phase where you refine and enhance your images, is crucial to making them truly stand out. Whether you’re a budding photographer or an experienced one looking to polish your skills, these basic post-processing tips will help you instantly improve your photos.
What is Post-Processing in Photography?
Post-processing is the stage in photography where we use software to edit and enhance our images after they have been taken. This can include a wide range of adjustments, like correcting exposure, tweaking colors, cropping, and sharpening. Essentially, post-processing helps you bring your creative vision to life by fine-tuning the raw images captured by your camera.
In the digital age, post-processing is an important part of the photography workflow. The goal of post-processing is not to change the reality but to enhance the photograph in a way that it reflects what you saw or felt when you took the shot. Think of it as the digital equivalent of the darkroom in film photography, where photographers would develop and perfect their prints.
Why do You Need Post-Processing in Photography ?
Post-processing plays a important role in transforming your raw images into polished, professional works of art. Here are five reasons why you need post-processing:
- Enhanced Image Quality: You can correct issues like underexposure, overexposure, and color casts, ensuring your photos look their best.
- Creative Freedom: Post-processing allows you to experiment with different looks and styles, giving you the freedom to express your artistic vision.
- Consistency: By applying similar adjustments to a series of photos, you can achieve a consistent aesthetic, which is especially important for portfolios and social media feeds.
- Rescue Poor Shots: Sometimes, an otherwise great shot might have minor flaws. Post-processing can rescue these images, turning them into keepers.
- Professional Touch: Well-processed photos look more polished and professional, which can make a significant difference if you’re presenting your work to clients or audiences.
Tips for Effective Post-Processing
Here are some basic Post-Processing tips to Instantly Improve Your Photos:
Shoot in RAW

Before going into post-processing, it’s important to shoot in RAW format whenever possible. Unlike JPEG, RAW files preserve all the data captured by your camera sensor, giving you greater flexibility in editing. It allows for more detailed adjustments without reducing the image quality.
Shooting in RAW gives you the most control over your final image. You can adjust exposure, white balance, and other settings with small reduction in quality. This format is very beneficial when dealing with challenging lighting conditions or when you anticipate making significant edits.
Adjust White Balance

White balance correction is fundamental to achieving accurate colors in your photos. Sometimes, the camera’s automatic white balance setting might not get it right, leading to a warm or cool cast. In post-processing, you can fine-tune the white balance to ensure the colors are true to life. Most photo editing software offers a white balance tool that lets you select a neutral point in the image or adjust the temperature and tint sliders.
Accurate white balance makes a significant difference in the mood and realism of your photo. For instance, daylight might require a different white balance setting than indoor lighting. Learning to adjust white balance effectively can help you bring out the natural colors and mood of your scene.
Enhance Exposure & Contrast

Exposure and contrast adjustments can dramatically improve the look of your photos. If your image is too dark or too bright, use the exposure slider to bring it to a balanced level. Increasing contrast can add depth and make your photo pop by making the darks darker and the lights lighter. However, be cautious not to overdo it, as excessive contrast can lead to loss of detail.
When adjusting exposure, aim to retain as much detail as possible in both the shadows and highlights. Contrast should enhance the image without making it look artificial. You can also use tools like shadows and highlights sliders to fine-tune specific areas of your image.
Sharpening & Noise Reduction

To bring out the finer details in your photos, apply a moderate amount of sharpening. Most editing software includes sharpening tools that enhance edges and textures. Alongside sharpening, use noise reduction to minimize graininess, especially in photos taken at high ISO settings. Striking the right balance between sharpening and noise reduction is key to maintaining image clarity without introducing artifacts.
Noise reduction is essential for low-light photos where grain can be more pronounced. However, too much noise reduction can make your image look soft and unnatural. The key is to find a balance that retains detail while reducing unwanted noise.
Crop & Straighten

Cropping and straightening are simple yet powerful tools in post-processing. Cropping helps you improve composition by removing distracting elements and focusing on the subject. Straightening ensures that horizons and other key lines are level, providing a more professional appearance. When cropping, maintain the aspect ratio unless a different framing enhances the visual impact.
A well-composed image often benefits from a slight crop to eliminate distractions. Straightening is particularly important for landscapes and architectural shots where level lines are crucial. These adjustments help ensure your photos are visually appealing and professional-looking.
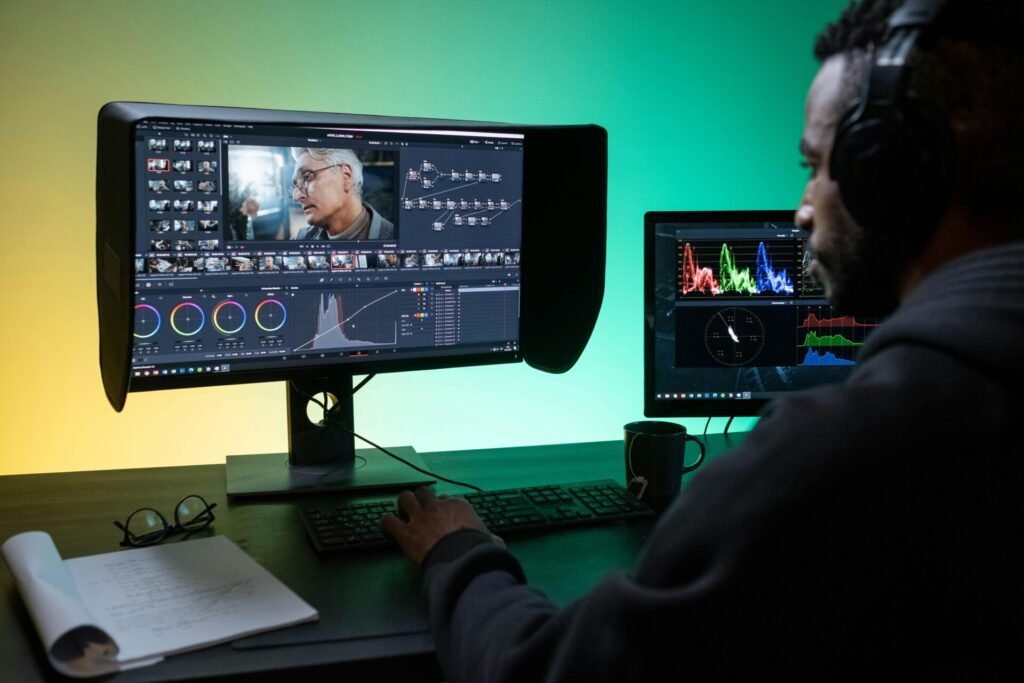
Use the Histogram

The histogram is an invaluable tool for assessing the exposure and tonal range of your image. It displays the distribution of tones from shadows to highlights. Aim for a balanced histogram without clipping at either end, indicating loss of detail in shadows (left) or highlights (right). Adjustments to exposure, contrast, and other settings can help you achieve a well-balanced histogram.
A balanced histogram typically forms a bell curve, indicating a good range of tones. However, different scenes will have different histogram shapes. The key is to use the histogram to ensure you’re not losing detail in important parts of your image.
Color Correction and Saturation

Colors play a vital role in the mood and impact of your photos. Use color correction tools to adjust individual colors or overall hue and saturation. Be mindful of over-saturation, as it can make images look unnatural. Sometimes, subtle adjustments are all you need to enhance the vibrancy and richness of your photos.
Color correction can involve adjusting specific color channels to correct color casts or enhance certain hues. Saturation increases the intensity of colors but should be used sparingly to avoid an unnatural look. Vibrance is a useful tool for subtly enhancing colors without affecting skin tones.
Use Presets & Filters

Presets and filters are great for achieving consistent looks across your photos and speeding up your workflow. Many editing programs offer built-in presets, or you can create your own based on your style. While presets provide a starting point, always fine-tune the settings to suit each specific image.
Presets can save time and help you develop a signature style. They can also serve as a learning tool by showing you different adjustment combinations. However, it’s important to adjust presets to fit the unique characteristics of each photo.
Dodge & Burn

Dodging and burning are techniques used to selectively lighten (dodge) or darken (burn) areas of an image. These techniques can help draw attention to specific parts of your photo, add depth, and enhance textures. Most editing software provides dodge and burn tools that allow you to paint with adjustable brush sizes and opacity.
Dodging and burning allow you to control the light and shadows in your photo, creating more depth and dimension. These techniques can enhance textures and highlight important elements, making your images more dynamic and engaging.
Final Touches & Exporting

Before finalizing your edit, take a moment to review the entire image. Make any necessary tweaks to ensure all elements are harmonious. Once satisfied, export your photo in the desired format and resolution. For online sharing, JPEG is typically sufficient, while for printing, you might opt for TIFF or a high-quality JPEG.
When exporting, consider the platform where your photo will be displayed. Different platforms may have specific requirements for resolution and file size. Ensuring your photo is properly optimized for its intended use will maintain its quality and impact.
Conclusion
Post-processing is an important step in photography that transforms good photos into great ones. By following these basic tips, you can enhance your images and bring your creative vision to life. Remember, the goal is to enhance the natural beauty of your photos while staying true to the moment you captured.
Recent Blogs
[psac_post_carousel show_author=”false” show_tags=”false” show_comments=”false” show_content=”false” slide_scroll=”2″]